NOTE: This guide is a general guide for setting up integrations with accounting systems. There are guides specific to Xero and Infusion, which work better if you're using those systems.
Crystal Payroll can integrate with several accounting systems. Click here for a complete list of accounting systems currently supported. For most systems, you only need to follow the first three setup sections.
Table of Contents
From Home, select "Company Settings", then "Import/Export".
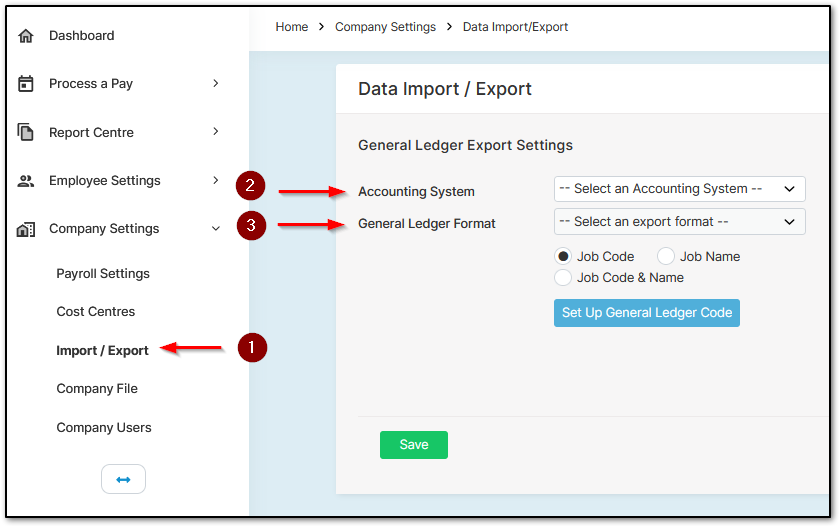
Under "General Ledger Export Settings", choose the Accounting System you want to export to, then select the appropriate General Ledger Format.
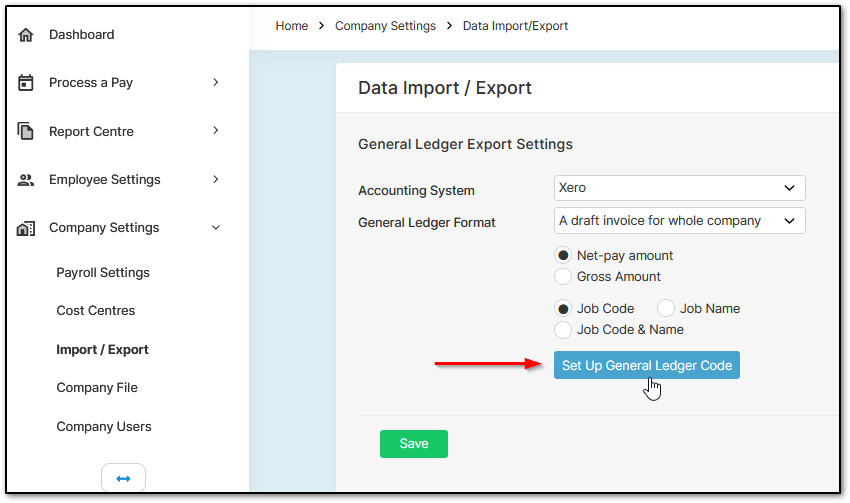
On the "Data Import / Export" page, select "Set up General Ledger Code" to open the code setup menu.
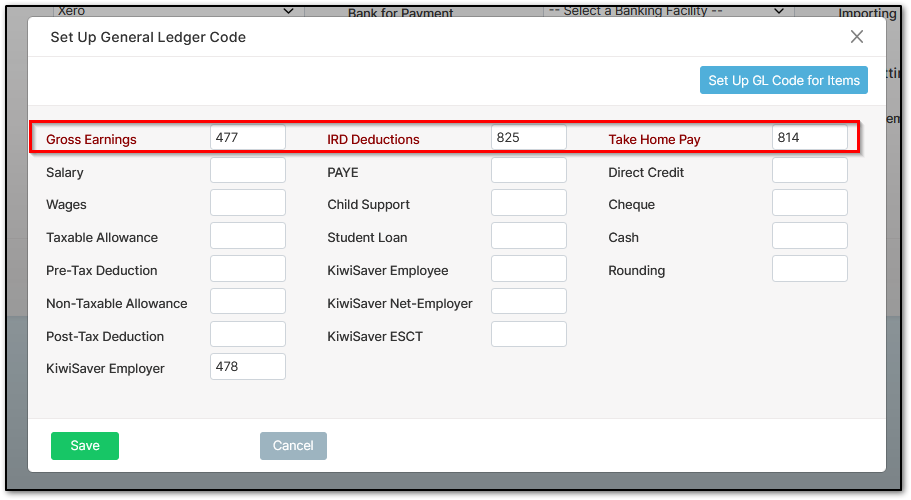
The first three items (shown in bold red) are required and cannot be edited. For the remaining items, enter the numbered account codes in the relevant fields and select "Save".
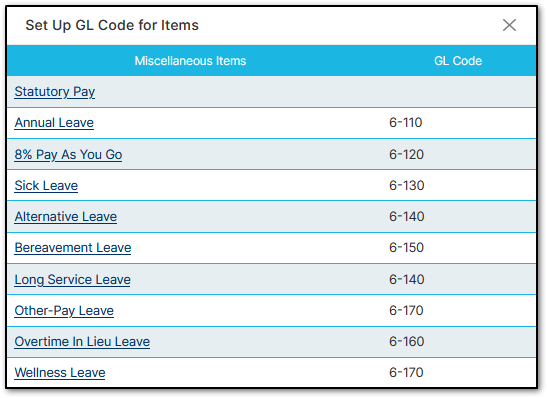
If you need to configure codes for additional items, select "Setup GL Codes for Items". This opens a menu with a list of optional categories. Choose your required item, enter a numbered code, and select "Save".
You can also assign cost centres with separate account codes for export. For more on this, view the article on "Cost Centres".
Select "Report Centre", then "Accounting Analysis", followed by "General Ledger Analysis".
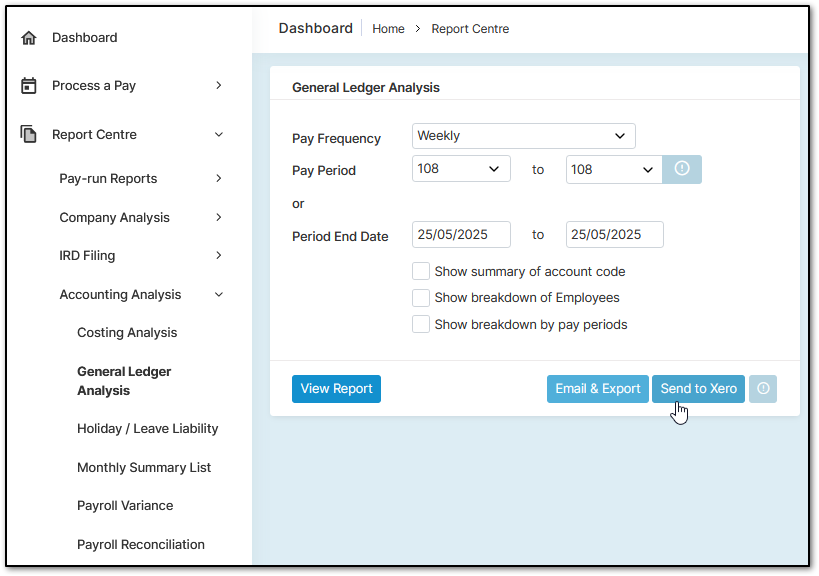
You can select a single pay period or multiple periods and choose your preferred display format—by summary, breakdown by employee, or by pay period.
Depending on your accounting software, you can then choose from the following:
This will export the general ledger in a compatible format.
You may also use "Email & Export" to preview the file, export it in PDF, Excel, TIFF, or Word format, or email it directly to a selected address.
Table of Contents
- How to set up Integration (Export & Import Data)
- How to set up General Ledger Codes
- How to export your Payroll Data
How to set up an Integration
From Home, select "Company Settings", then "Import/Export".
Under "General Ledger Export Settings", choose the Accounting System you want to export to, then select the appropriate General Ledger Format.
How to set up the General Ledger Codes
On the "Data Import / Export" page, select "Set up General Ledger Code" to open the code setup menu.
The first three items (shown in bold red) are required and cannot be edited. For the remaining items, enter the numbered account codes in the relevant fields and select "Save".
If you need to configure codes for additional items, select "Setup GL Codes for Items". This opens a menu with a list of optional categories. Choose your required item, enter a numbered code, and select "Save".
You can also assign cost centres with separate account codes for export. For more on this, view the article on "Cost Centres".
How to export your payroll data as a journal
Select "Report Centre", then "Accounting Analysis", followed by "General Ledger Analysis".
You can select a single pay period or multiple periods and choose your preferred display format—by summary, breakdown by employee, or by pay period.
Depending on your accounting software, you can then choose from the following:
- "Generate a File"
- "Send to Xero"
- "Send to Farm Focus"
- "Send to Reckon"
This will export the general ledger in a compatible format.
You may also use "Email & Export" to preview the file, export it in PDF, Excel, TIFF, or Word format, or email it directly to a selected address.
Was this article helpful?
That’s Great!
Thank you for your feedback
Sorry! We couldn't be helpful
Thank you for your feedback
Feedback sent
We appreciate your effort and will try to fix the article